
MS POWERPOINT
INTRODUCTION What is PowerPoint?
This is a complete presentation graphics package. It gives you everything you need to produce a professionally looking presentation. It enables you to express your ideas in graphics, text and objects all in one.
What is presentation?
It is a collection of slides, handouts, speaker‟s note, and outline all in one file. As create a slide you are creating a presentation, giving it a format that will carry through from beginning to the end.
What is a slide?
Slides are individual pages of your presentation. Slides have titles, text, drawn objects, shapes, clip arts, and visuals created with other application.
Starting PowerPoint
From the start menu select programs and the move to PowerPoint and click.
By default it creates a new presentation 1 for you with a window shown below.
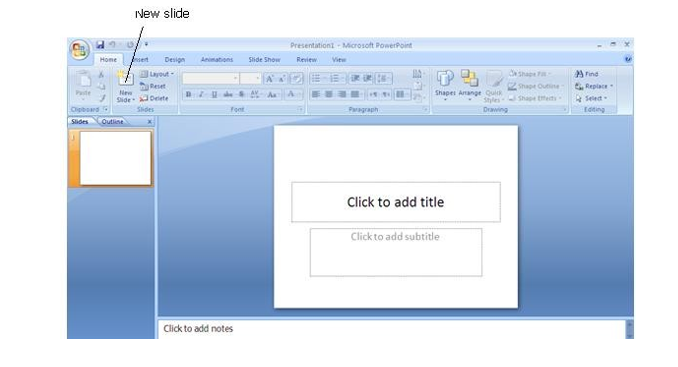
8.1 Starting a presentation
- Type the title and anything else on the layout on the first slide
- On the “Home tab”, click “New Slide” and select a new layout for the next slide.
- Repeat steps 2 for each new slide.
N.B: You can put as many slides as desired.
8.2 ADDING AND FORMATTING TEXT
Add text.
Normally the easiest way to add text to a slide is to type directly into any placeholder that accommodates text. However when you want to add text outside a placeholder you use “Text Box tool on the format tab.
Changing the font and color of the text
- Highlight the text to be formatted
- From the home tab click font
- Choose the desired font size color e.t.c
Add, change or remove a bullet
After you create a bulleted text, you can change the look of the bullets: their size, shape, color, e.t.c
To change a bullet, you need to highlight the test associated with the bullets. You cannot highlight a bullet.
- Highlight the text
- In the home tab, select bullets
- Choose from the variety of bullets and click
- Specify things like color and the size.
FORMATTING YOUR SLIDE
Colors and designs are added to slides in a presentation for enhancement. They also help in capturing the attention of the audience. You can either add a background color, apply design or both.
Applying background
- Choose the slide you want to apply background (if you have several) by scrolling.
- In the design tab, chose the background you desire.
Applying design
- Choose the slide you want to design.
- In the design tab chose, the desired design.
8.3 WORKING WITH DIFERENT VIEWS
A slide can be looked at in different angles. These views help a lot while working on your presentations.
To access the views, click the view tab. The most common views are:
- Slide: Views individual slide.
- Outline: Views all slides (outlined). NB.Graphics & Text effects cannot be viewed in outline.
- Slide sorter: Miniatures all slides in your presentation. You can animate, transit, sort etc in this view.
- Slide show: Complete presentation is run in this view.
Deleting a slide
- Select the slide you want to delete
- On the home tab, click Delete
8.4 WORKING WITH OBJECTS
Objects in PowerPoint could be any of the following
Clip Arts
Tables and graphs from other applications e.g. Excel
Paint brush pictures
Media clips and many more
PowerPoint comes with its own set of pictures in the clip art gallery. The clip art gallery includes a wide variety of clip arts that makes it easy for you to dress up your presentation with professionally designed images. You will find everything from maps to people and from buildings to scenic backgrounds.
Inserting pictures in your presentation
- From the insert tab point to clip art
- You can choose from the
- From the source you have chosen, chose the picture and click insert.
Inserting Shapes
- From the insert tab click shapes
- Move to desired category
- Choose the shape and click
- After the mouse pointer changes shape, click and drag at the insertion position.
Working with organization chart
- Insert a slide and select the smart art option as shown below
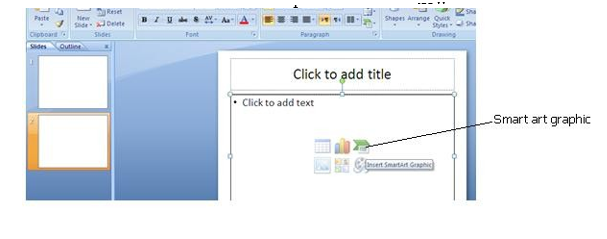
Use the chart‟s tools and menus to sign your chart
8.6 ANIMATION
You can animate text, graphics sounds, movies, and other objects on your slides so as to focus on important points, control the flow of information, and add interest to your presentation. You can have each main bullet point appear independently of others, or you can have objects appear progressively, one after another.
You can set up the way you want each bullet point or object to appear on your
slide e.g. to fly in from the left and whether you want other bullets or objects to dim or change color when you add a new element. You also change the order of timing of your animation.
Animating objects & text on the slide.
- In the animations, display the slide that has the text or objects you want to animate.
- On the ribbon, click “custom animation”, and then click timing tab.
- Under “slide objects without animation‟, select the text or object you want to animate and then click animate.
- Choose „on mouse click‟ to activate the animation after a mouse click or „automatically‟, and then enter the umber of seconds you want to elapse between the previous animation and the current one.
- Click the effect tab.
- If you are animating a chart in Microsoft Graph, click the Chart Efforts tab.
- Under „entry animation and sound‟, select the options you want.
- Click the timing tab and repeat steps 3 through 6 for every object you want to animate. You can click the preview button to see how your animation works.
Changing the order of the animation on a slide
- In the slide view, display the slide you want to change the order in.
- On the slide show menu, click Custom Animation.
- Under „animation order‟, select the object you want to change, and the click one of the arrows to move the objects up or down on the list.
- Repeat the process for each objects whose order you want to change.
Add an effect on an animated object after it appears
- In slide view, display the slide you want to add an effect to.
- On the slide show menu, click Custom Animation, and then click the effects tab.
- Under animation order, select the object you want to add an effect to, and then click an option under after animation.
- Repeat the process for each object you want to add and effect to
Add Transitions To A Slide Show
For the slide show to flow well you need to transit your slide.
- In the slide view, select the slide you want to transit
- On the animation tab click „slide transition‟.
- In the effect box, choose a transition.
- To apply a transition to one slide, click apply. Click „apply to all‟ for all the slides.
- To view the transition, click slide show.
8.7 SAVING A PRESENTATION
There are different options of saving a presentation. The common ones are:
Saving a new or existing presentation to always open as a slide show.
- Open the presentation you want to open as a slide show.
- On the office button click, save as.
- In the „save as type‟ list box, click PowerPoint show.
- Choose the drive in the „save in‟ box.
- Click save.
8.8 PRINTING
You can print your entire presentation either in black and white or color.
- Open the presentation you want to print.
- Click print from the file menu.
- In the resulting dialog box, choose and click as appropriate.
- Click okay.